Mar 24, 2014

My New Spring Apron - from old floral curtains, Repurpose!

My new Spring apron


My weekend project!

Aprons make my heart smile.

They make me feel as though
I've stepped back in time to an
era of innocence & purity...

and considering I'm a really
messy cook might have factored 
in a bit too!


My New Spring Apron from old floral curtains!


I found these old floral curtains
in my material stash, I believe 
they hung in my daughter's room 
for a short time when she was little. 
(well before her, "everything need's to be black" phase!) 

Why not!  
I wasn't going shopping for some time 
and I wanted to make my apron now!
Floral, Spring...makes sense!

I used my current apron as a pattern,
cutting the fabric just a tad larger for
the seam allowance. 


I cut four strips of fabric,
folded the edges to the inside
and top-stitched.
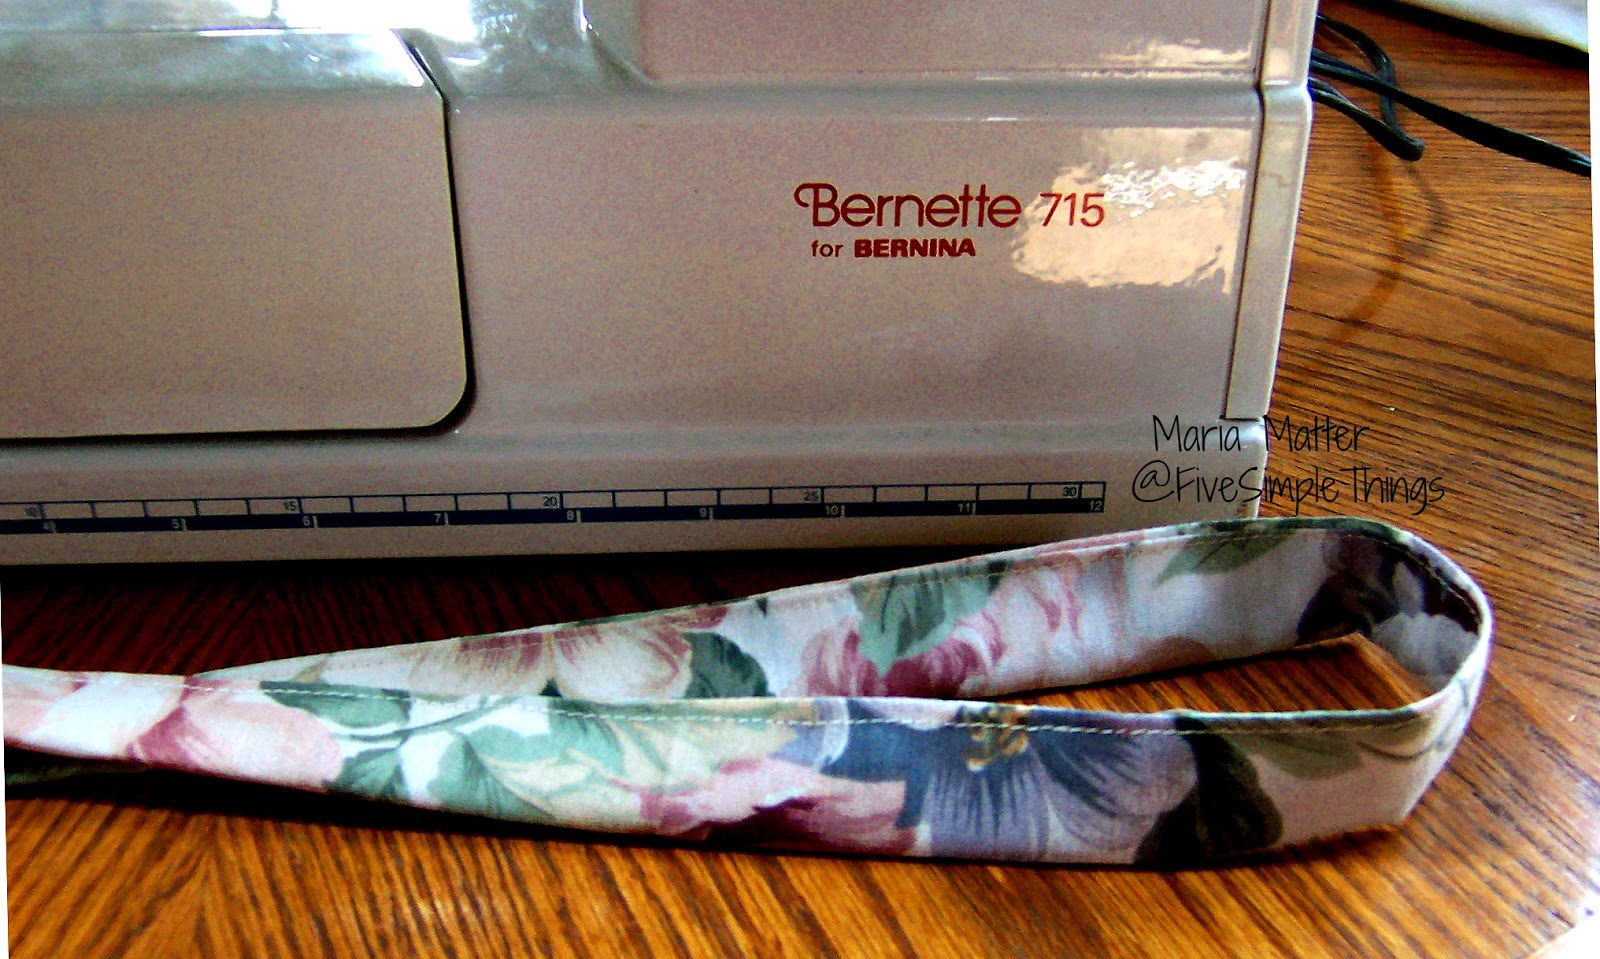

apron strings!

I forgot how much fun sewing could be!


I cut my fabric, keeping the bottom hem
of the curtain as my bottom hem!

This apron came together in about 2 hours!
I won't win any sewing contests but I was
thrilled with the result!
I now feel fashionably equipped to make my
first spring-themed meal!

Bonus: with the sewing machine set out, 
my daughter is starting on her 2nd quilt now! 


I was inspired to make my apron 
when I saw the aprons Nana & Pam 
made @ 2 Creative Chicks!

thanks ladies!!
2 Creative Chicks
Challenge #12 - make an apron


Follow on Bloglovin
♥ Follow Me On Bloglovin'

For more adventures on the Matter homestead, follow me! (:

also sharing @ Homestead Barn Hop, DL.Art. Busy Monday, Project Inspired 


Mar 20, 2014

My Garden Journal


Good Morning Spring!

It may not feel quite like spring yet, 
but just the thought of those mild temps, 
sunny days and thawing soil makes 
my green thumb tingle!

Being a bit impatient to get this gardening
season under way, I popped into the dollar
store to if they had seed packets yet.

Startin' Seeds

They did!  
So I bought some of everything! I'm 
determined to fill every nook & cranny
in the yard with something edible!

But before I plant even my first seed, 
there is a very important task to be completed!

My garden journal!

Keeping good records is a key 
factor in successful gardening.  

Your garden journal will become your 
trusted companion. Noting important
details such as: 
  • frost dates for your area
  • lists of herbs & veggies you want to grow
  • planting dates 
  • garden bed designs for sun & shade areas
  • correct spacing for plants
  • soil maintenance
  • pest control

You'll make note of your plans for plant rotation, 
companion plantings, harvest amounts and possibly
weather conditions.

Maybe even including some drawings or recipes
along with tips & advice given from more
experienced gardeners!

Of course, any notebook can serve as a garden
journal, but as a crafter, I needed to alter & 
embellish mine before starting it for the new
season!

garden journal using papers by
Echo Park (For the Record) and
embellished with washi tape & faux stitching

Need to know the last frost date for your area?

Are you excited for planting season?
Do you keep a journal?


Follow on Bloglovin
♥ Follow Me On Bloglovin'


Mar 19, 2014

I'm a Prepper...who knew!


It all started with my first copy of Countryside and Small Stock Journal from a neighbor, years ago.

Countryside & Small Stock Journal

It had articles from all these wonderfully self sufficient people who raised animals, had huge gardens, preserved their own food and cooked from scratch. 
They called themselves homesteaders!

Omgosh, I so wanted to be one of "them"!

Fortunately, my hubby was totally on board and
we started raising small animals and gardening.
(this was all new to me!)

Then the canning frenzy began. 

Preppers preserve their produce.

We wanted to preserve all that lovely garden produce to enjoy during the long winter months.

My pantry shelves were full, I felt so accomplished!

I remember the first time I canned our own pickles, 
I thought I was a success because they tasted just like 
the store brand. lol I'm sure I showed my mason jars 
of pickles to everyone who stopped by!

When the babies started coming and life became increasingly busy, hubby & I would go on large shopping trips to stock up for the month so I was never without the food I needed to feed our growing family. 

It was a wonderful feeling to 'shop' our pantry.

Preppers stock up!


All these years, I thought we were just being homesteaders. 
Seems there's a new name for what we do now. Preppers!

I'll accept that, I guess.  We are prepared over the winter months when the snow storms come and the electricity fails.  Or the summer months when the lightening storms & high winds gust and the electricity fails...again!

blizzard hurrican oil lanterns

Being a Prepper is a good thing, I believe, whether for convenience or for emergencies, it brings about a sense of peace.


And it fits right into our simple lifestyle and that makes my heart happy! 


Are you a prepper?


Follow on Bloglovin
♥ Follow Me On Bloglovin'

Mar 14, 2014

Homeschool Resources - The Home Schooling Matters


On any given day during the cold winter months,
you may find me hunkered down under a blanket,
on a cozy chair near the woodstove, surrounded 
by seed catalogs or homeschool catalogs and my
trusty notebook.

Writing down all my grand ideas for the 
upcoming season!


At our home, next year's homeschool planning 
starts now, so I'll have my plan in place before 
the many spring homeschool used book sales 
and the large homeschool conventions in April & May.

In addition to our curriculum-specific catalogs,
These are our favorite 'in general' catalogs.


Timberdoodle


Lifelong Learning Resources and Children's Books Inc.

Sonlight Curriculum, Ltd.


Nature's Workshop Plus!


Christian Book Distributors


I also Google: "homeschool Scope & Sequence"
for ideas!


In another post, I'll share some of our all-time
favorite curriculum. Mom tested, kid approved!


When do you start planning?
What are some of your favorite 
homeschool resources?


Follow on Bloglovin
♥ Follow Me On Bloglovin'

Mar 12, 2014

Friends - Herbs of Life


I'm SO ready for gardening season to begin!

But here in Pennsylvania our last frost date is the
beginning of May, so I'll just have to dream about
my veggie & herb gardens!

Meanwhile, I have this card to share with you today.

Doodle Pantry digital images (Rosemary)
colored with Copic markers

Thanks so much for stopping by, enjoy your day!


Follow on Bloglovin
♥ Follow Me On Bloglovin'

Mar 4, 2014

Homemade Peanut Butter Icing


Truth be told, I'm not a peanut butter lover...
unless it's nestled inside a layer of milk chocolate.

But others in my home, who shall remain 
anonymous, eat the stuff right from the jar!!

We are a JIF creamy, of course, family! Born & bred...
meaning my hubby & kids can differentiate
between JIF and ANY other brand of peanut butter!

So for this recipe, you guessed it, I use JIF!

Peanut Butter Icing

3 to 4 cups powdered sugar*
½ cup butter
1 tsp vanilla 
½ cup creamy peanut butter*
⅛ to ¼ cup milk*

Cream together powdered sugar and butter.
Add vanilla, mix.
Add peanut butter, mix.
Slowly drizzle in milk until icing reaches a
spreadable consistency.

*At this point, it's all about taste preference.
If you need it sweeter, add more powdered sugar.
If you need a stronger peanut butter taste,
add a little more peanut butter.

Play around with the recipe a bit & make it your own!


Baking is not a science, it's a joy! ~ maria matter :)

In reference to my opening statement, 
when making this icing, of course I always
think it's too peanut buttery. Fortunately
I never have a shortage of taste testers in
my kitchen willing to set me straight! 

This icing compliments this chocolate cake perfectly!

Enjoy!


Follow on Bloglovin
♥ Follow Me On Bloglovin'

Mar 1, 2014

Easy Chocolate Cake - NO EGGS! printable recipe


Ahh, nothing quite says love like chocolate cake 
with peanut butter icing. at my house, at least!

This is my GO-TO chocolate cake and 
#1 requested cake for birthdays!  
It whips up in a flash and is moist, 
delicious and oh-so-easy to make!

It starts with 3 easy steps...
1. melt a stick of butter, remove from heat.
2. stir in the vinegar, vanilla & 2 cups of water.
3. Set aside...that's it for the wet ingredients!

For the dry ingredients:
Combine your flour, sugar, cocoa powder, 
baking soda & salt.


Stir the butter mixture into the 
dry ingredients with a FORK
until the lumps disappear.

Pour into a cake pan and bake!


Top it with your favorite frosting or 
a dollop of whipped cream!

Check out my "quick" tips below!
Enjoy!

--------------------------------------------------------------------------

Chocolate Cake - NO Eggs

½ cup butter
 2 tsp. vinegar
 2 tsp. vanilla
 2 cups water
 3 cups all-purpose flour
 2 cups sugar
 6 Tbsp. cocoa powder
 2 tsp. baking soda
 1 tsp. salt

Melt butter, remove from heat,
Stir in vinegar, vanilla and 2 cups of water.
Set aside.

Combine flour, sugar, cocoa, baking soda and salt.
WITH FORK, stir butter mixture into dry ingredients
until lumps disappear and mix is smooth.

Bake @ 350°F. for 30 minutes or until toothpick comes
out clean.

Chocolate Cake - NO Eggs from Maria Matter @ Five Simple Things 2014


-------------------------------------------------------------------


TIPS
-this cake mixes up so easily, 
you can just mix it up right in your 
cake pan then pop it in the oven,
no need to dirty a bowl!

-to pull this cake together even
quicker; combine the dry ingredients
together in a mason jar to keep on 
hand. Kinda like a boxed cake mix!


Thanks so much for stopping by. I'll share my delicious peanut butter icing recipe along with some other 
favorites this coming week.

Follow on Bloglovin
♥ Follow Me On Bloglovin'